Account Set Up
Step 1. Click the red text "Upload Job" on J2b.com homepage

Customer vs Guest account
If you have an existing account with J2, you may need to create your new log in if you have no done so yet. Otherwise, upload as a guest.
For Creating Login for existing business accounts, you will need your account number for the next step. If you need this information please call into our office at 360-696-1861.

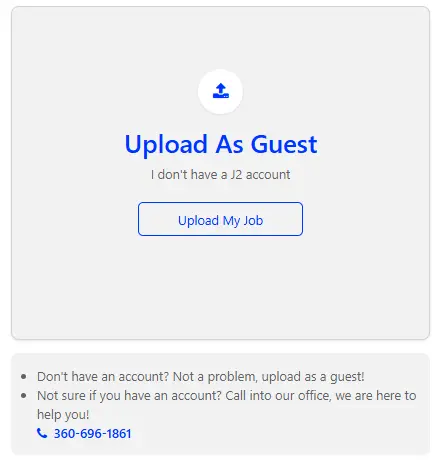
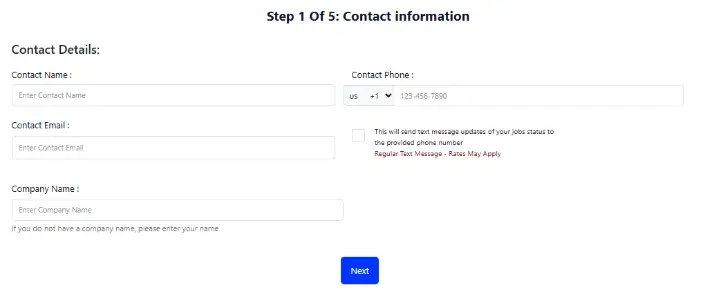
Guest Customer
Customers without an account can place orders using the Guest Upload option. Payment is required at the time of pickup. To submit your order, please complete the entire form.
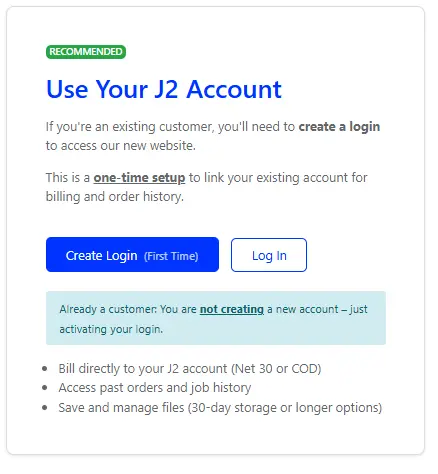
Business Customers
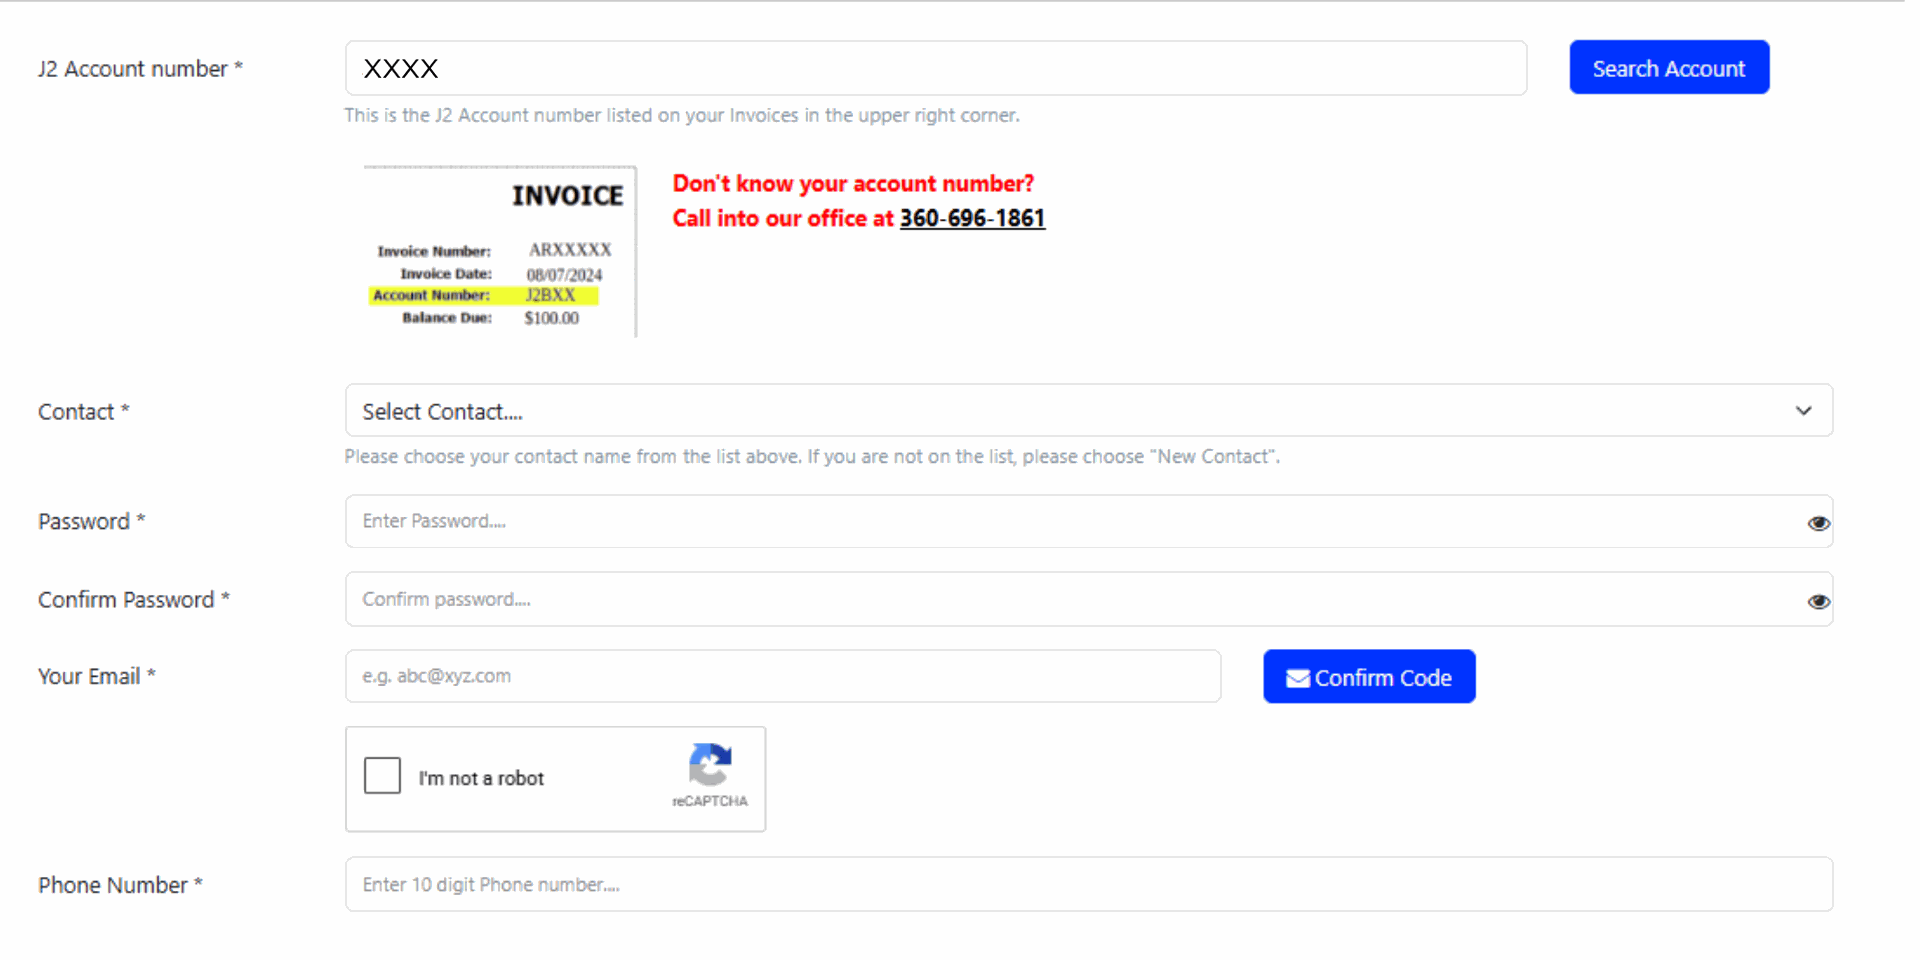
If you have a J2 Net 30 or COD account and would like to pay with your account, start by locating your J2 Account Number on a previous invoice or statement.
Click "Create Login" if this is your first time, or log in if you have already done so.

This number can be found in the top right corner of a sales order or invoice and is a 2 –5 digit code. Enter your account number in the field provided, then click “Search Account.”
If you don’t have your account number handy, please call our office at 360-696-1861 and we’ll be happy to provide it.

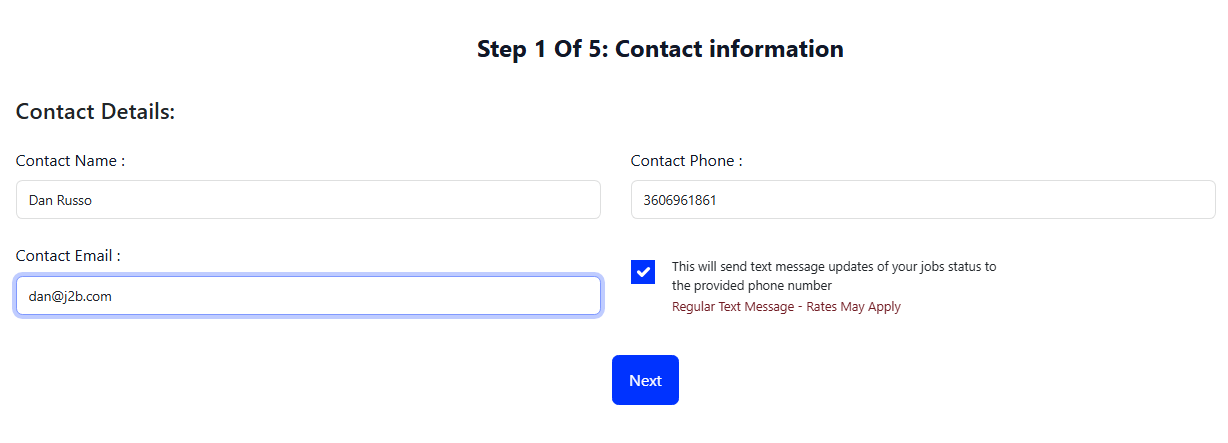
Select Your contact info
Choose your contact in the drop down menu of contacts, if you do not see your name on the list click Create New Contact.
Fill out the contact form information of your choosing, then click the Confirm Code button.
You will then receive an email from us with a temporary OTP code for verification purposes.
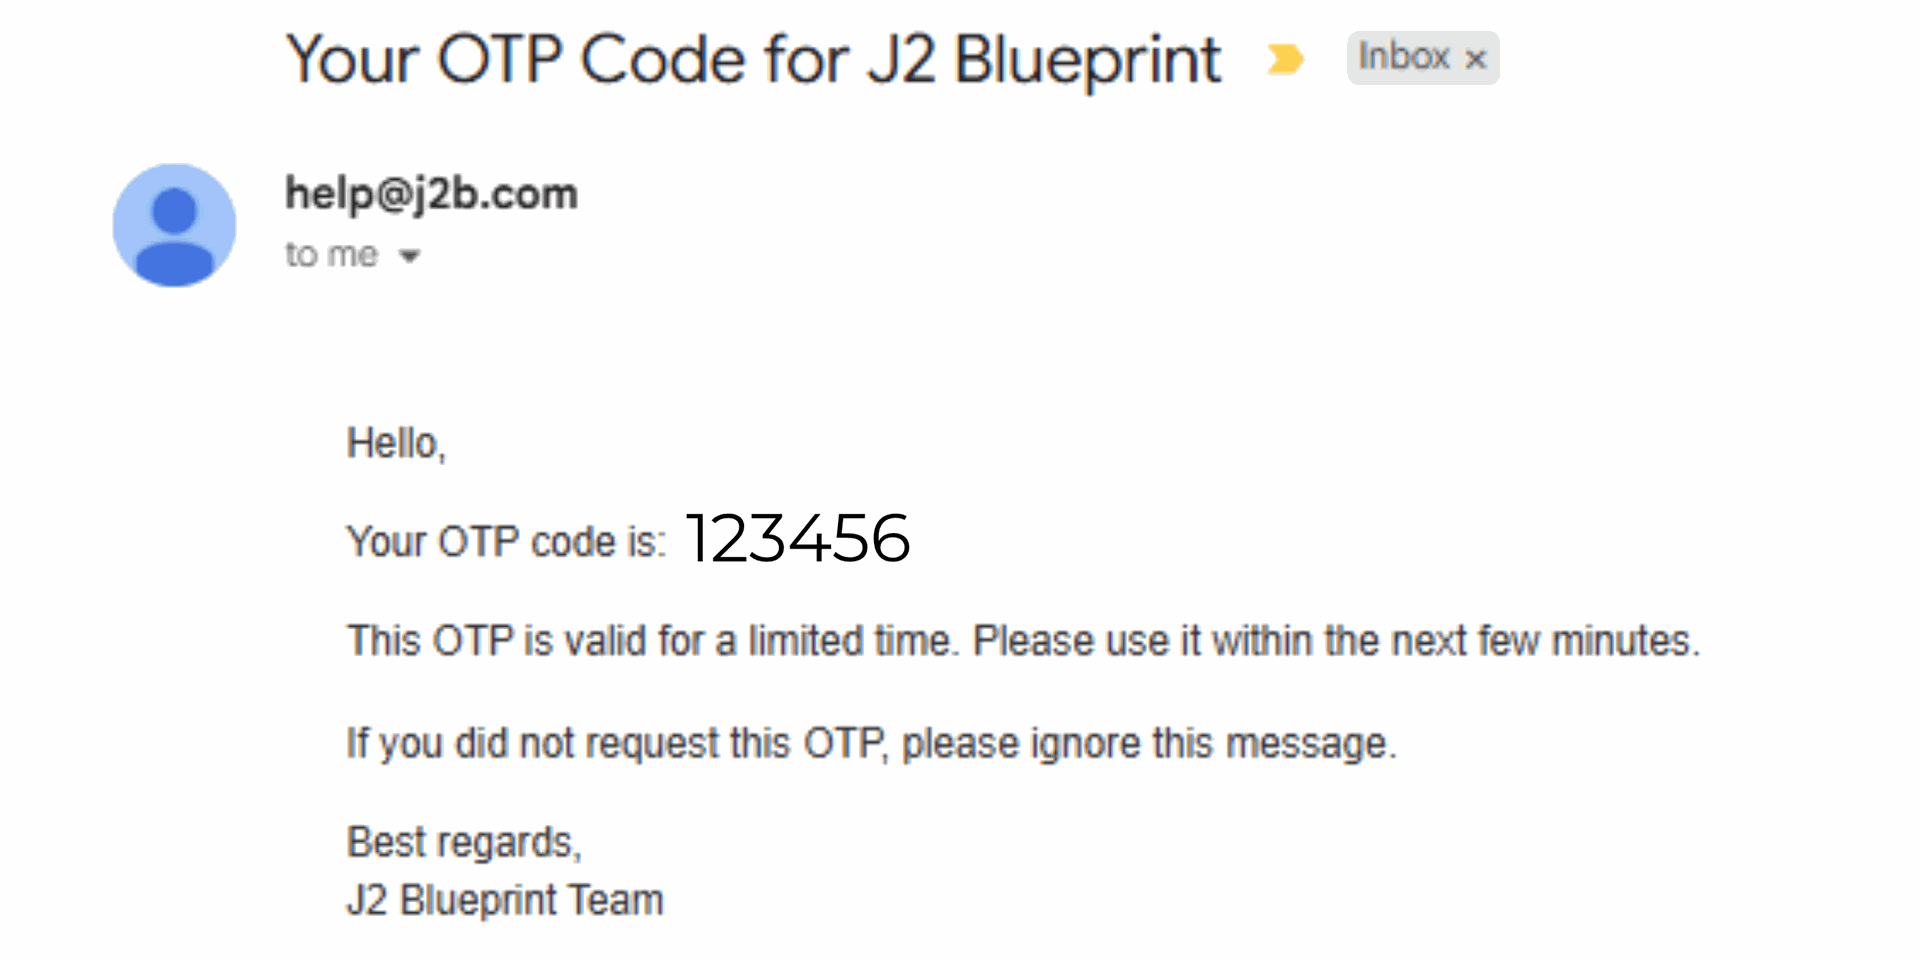
From Help@j2b.com, you will receive your OTP code. Enter this in the box when prompted.

Click sign up and you're ready to place an online order through your company account! You should be automatically signed in, if not, click 'Log In' using your new credentials.